 TodaysBru
How to automate IT ticket routing without code
A practical guide to routing support requests, setting priority, and escalating urgent work with a plain-English workflow.
· 5 min read · The TodaysBru teamManual ticket routing is easy to start and hard to keep consistent. Someone has to read every request, decide which team should own it, set a priority, and remember to escalate it before the SLA slips. A small team can lose hours to that work every week.
TodaysBru lets an admin describe that process in plain English. The system turns the sentence into a rule you can review, preview against existing tickets, and enable when it looks right. Here is how to build one.
1. Start with one repeatable decision
Choose a request that already has a clear owner. Good first examples include onboarding requests, VPN issues, or access requests. Write down the category, destination team, priority, and any notification or escalation that should happen.
Example: “When a new ticket is in the Onboarding category, assign it to Desktop Support and set the priority to high.”
2. Describe the workflow in one sentence
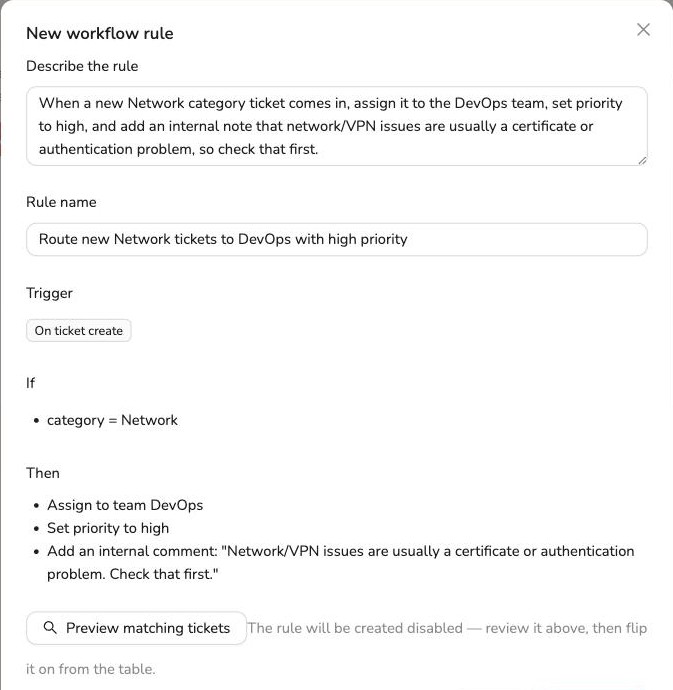
Open Admin → Workflows and enter the sentence as the starting point. TodaysBru identifies the trigger, condition, and actions. You do not need to draw a flowchart or choose a technical operator.
3. Review before enabling it
Check each action and preview the tickets that would match. New workflows start disabled, so you can correct a category name, team, or priority without affecting live work. Enable the rule only after the preview matches your intent.
4. Test with a real request
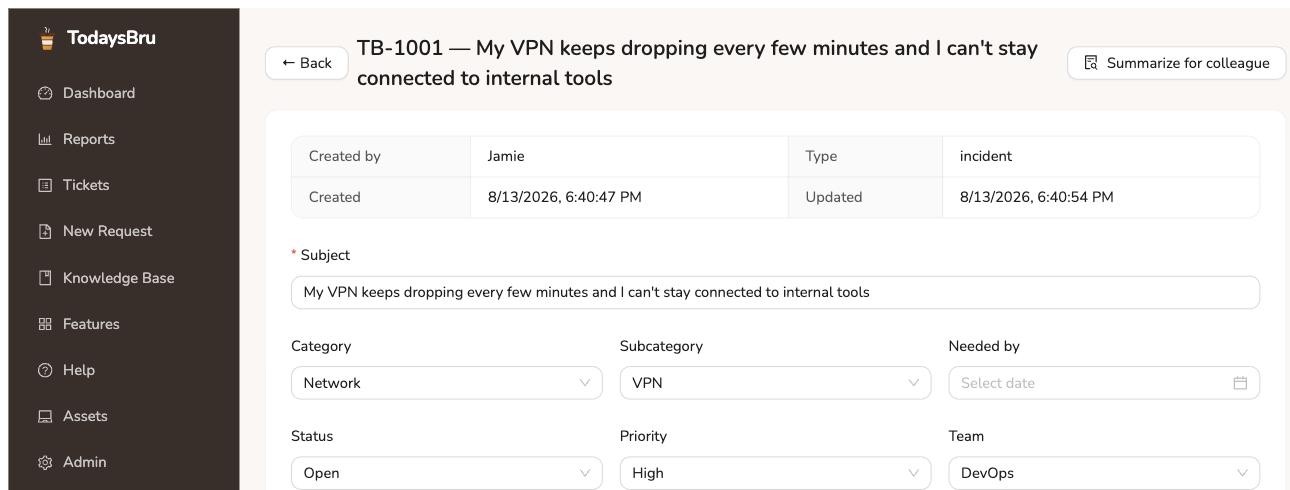
Submit a sample ticket from the web form or describe the request in AI chat. The same classification and routing rules apply whichever channel the requester uses. Confirm that the ticket reaches the expected team, receives the expected priority, and starts the right SLA clock.
5. Add escalation only when the first rule is stable
Once the basic route is working, add a second rule for the exception: for example, escalate a critical network outage immediately or notify a manager when a high-priority ticket is still open near its target. Keeping each workflow focused makes its behavior easier to review later.
The result is simple: people describe the problem, and the ticket arrives with the right owner and urgency already attached. You can watch the workflow demo or read the full workflow guide in TodaysBru Help.